Friday 24 April 2015

Brioche & Bacon bread... and bananas along the way!


Well, after all the sweet treats of Easter I thought it was time for a change, and dived into the bread making section of 'Bake'.  Then for some reason, I decided to make Brioche - a sweet, enriched bread,  Oops, my sweet tooth won again!  Still, it was well worth it.  For those who don't know, brioche is a dough with a high butter and egg content - it has a really light texture and golden colour.  


You can buy moulds to shape brioche in the traditional way, like so...


Not my creation, I hasten to add!

As we've been trying to economise a bit, I decided not to buy the moulds, but use the tins I had.  So I used 1 standard loaf  tin, and 4 mini loaf tins.  The latter I bought ages ago, as I thought they were cute (I'm a sucker for cute) and  this was their first outing.  I was pleased with all the results, both in taste and appearance.  The mini loaves sliced perfectly into dinky little slices, which Megan devoured for breaskfast, spread with  butter &  jam.  I think they'd look gorgeous arranged on a cake stand, as part of an afternoon tea. 

Then I did manage a savoury - bacon and cheddar bread.  This is a very easy, hearty loaf, which could be knocked up quickly for those occasions when you've run out of bread and just need something for lunch. 


 I enjoyed it with tomato soup yesterday, and grilled and buttered today. 


Here's the recipe, if you'd like to have a go...

  • 320g (11 1/2oz) plain flour
  • 1 tbsp. baking powder
  • 1/2 tsp salt
  • 1/4 tsp freshly ground black pepper
  • 100g ( 3 1/2ox) Cheddar cheese, grated
  • 100g (3 1/2oz) bacon lardons, cooked until just crisp then cooled
  • 200ml (7fl oz) milk
  • 2 eggs
  • 1 tbsp. wholegrain mustard (I used Dijon as that was all I had)
  • 60ml (2 fl oz) olive oil

  1. Preheat oven to 180C/350F/GM4.  Lightly oil and line the loaf tin with parchment paper.
  2. Sift all the dry ingredients into a large bowl.  Add the grated cheese and lardons.  Mix well,
  3. Pour the milk into a large measuring jug, add the eggs; mustard and olive oil, and whisk to combine.
  4. Make a well in the centre of the dry ingredients and slowly pour in the liquid, stirring all the time until it is fully incorporated, to form a fairly liquid dough.
  5. Pour the mixture into the prepared tin, and bake in the oven for 50 minutes.  Remove from the tin, and cook for a further 10 minutes, directly on the oven shelf to crisp the bottom.  When cooked, it will sound hollow when tapped on the bottom.  Cook on a wire rack before eating.

Rachel also provides variations of pumpkin seed, Gruyere and thyme leaf bread; and sun-dried tomato, rosemary and olive bread.  Will definitely try these at some point!

Over the last week, I've also made 'baked breakfast omelette' with bacon; cheese; mushrooms and herbs.  Really good!


I've also tried Rachel's baked bananas.  Now, it's not very often that a Rachel recipe lets me down, but I was disappointed with these.  We often have baked bananas after a barbecue, left in their skins, wrapped in foil and cooked on the coals.  Rachel's version are peeled and then baked in the oven.  We found that the texture went a bit strange - almost potato like.  I was looking forward to trying her accompaniment of 'orange, honey and mascarpone cream' but also found this a bit strange - more of a liquid than a cream, and the flavours didn't seem to combine very well.  Oh well. you win some you lose some!  
 
Going to attempt bagels next, back soon with the results!


Friday 17 April 2015

How to joint a chicken... and other tales (vegetarians look away now!)


Jointing a chicken is a skill I've wanted to master for ages.  I've kept hearing how much more economical it is to do this, instead of buying separate chicken pieces.  However, I always imagined it to be really complicated.  Well, making Rachel's chicken and leek pie gave me the perfect excuse to learn.  I trawled the internet, hoping to find a clip of Rachel herself demonstrating - but couldn't.  Instead, I found this old clip of Delia showing how it's done


Slightly off-putting, as she begins by saying that the best way to joint a chicken is to get the butcher to do it for you.  Doesn't inspire confidence!  However, her instructions are clear, and the whole thing much easier than I imagined.  Here's how I did it...
 
 
1.  Make sure you've got a really sharp knife to start with.  Locate the 'parson's nose', as shown here.  Make a cut through this.
 
 
2.  Stand the chicken in a vertical position, and starting with your original cut, slit right down through the backbone.  Open the chicken out flat, like a book, with the skin side down.


3.  Now cut through the breastbone to halve your chicken.
 
4.  Turn your half chicken over, and stretch the legs out with your hands.  You'll see a distinct white line appear in the middle - cut through this to produce a quartered chicken.
 
5.  To divide your chicken into 6, turn over the quartered leg portion.  You'll see an obvious piece of white fat.  Move this aside, and you'll again see a white line.  Cut through this.
 
Hope that makes sense.  If it doesn't, watch Delia! 
 
The chicken pie itself is quite easy.  You cook your chicken portions with stock, wine and herbs and saute some leeks in butter.  A sauce is made from the chicken poaching liquid; cream; and mustard.  The chicken meat is pulled from the bones and mixed into the sauce, with the sautéed leeks.  The mixture is then poured into pie dishes, topped with puff pastry and baked.  It makes a really rich, comforting meal.  I will say that although this recipe uses a whole chicken, you probably don't need to.  You could add extra vegetables to bulk it out, and make for a more economical recipe.  You could also use leftover roast chicken, and this would save a lot of time and effort in preparing the meat.
 
In other escapades, I had a go at Rachel's 'Cherry Crumble Cake'.  I was off to a charity race night - the sort of event where you watch videos of horse races and place your bets.  We were provided with a fish & chip supper, but were allowed to take our own accompaniments.  I wanted to take something fairly 'desert like', but easy to eat with fingers.  This perfectly fitted the bill.  I'll include the recipe here, as I think it's a really useful one, and one which I'm sure I'll make a lot.  I actually replaced the cherries with a portion of stewed apple, which tasted great.  The crumble topping disappeared a bit and lost its crunch - I don't know it this was because of the wetness of the apple.  But I think I'd make a double quantity of topping next time.  Oh, I've also just spotted half a jar of mincemeat in the fridge - I'd like to try this for the filling another time.
 
  • 350g (12oz) stoned cherries (fresh, canned or frozen - not glace)
  • 150g (5oz) self-raising flour
  • Pinch of ground cinnamon
  • 50g (2oz) caster sugar
  • 1 egg
  • 30mls (1fl oz) milk
  • 100g (3 1/2oz) butter, melted
  • Icing sugar, for dusting (optional)
 
For the crumble topping
 
  • 25g (1oz) plain flour
  • 1/4 tsp ground cinnamon
  • 25g (1oz) caster sugar
  • 25g (1oz) butter, cubed
 
  • 20cm (8in) diameter spring-form/loose-bottomed tin
 
  1. Preheat oven to 180C/350F/GM4.  Butter the sides of the cake tin, and line the base with greaseproof paper.
  2. Sift flour and cinnamon into a large bowl, add sugar, mix together and make a well in the centre.
  3. Whisk eggs; milk and melted butter together in another bowl, then pour into the dry ingredients and combine with a wooden spoon or whisk.  Beat well to make a thick, smooth batter, then spoon into cake tin and spread evenly.  Scatter cherries over mixture, and gently press in with the back of a fork.
  4. To make the topping, tip all the ingredients into a bowl.  Rub in the butter with your fingertips to make a crumb-like mixture, then scatter the topping over the cherries.
  5. Bake in the oven for 30-35 minutes, or until the top is lightly golden and a skewer inserted into the middle comes out clean.
  6. Leave in the tin for about 10 minutes, until cool enough to handle, then run a knife around the edge and remove the cake from the tin.  Allow to cool on a wire rack.
  7. Dust with icing sugar if you wish, then serve.
(Sorry, no photos, it was all gobbled up too fast!)


Tuesday 7 April 2015

Happy Easter!


Hope you've all had a great Easter weekend!  We've had a good one, full of food; fun and family.  My parents stayed for 5 days, which was lovely, and provided plenty of opportunity to try out some new bakes.
 
 
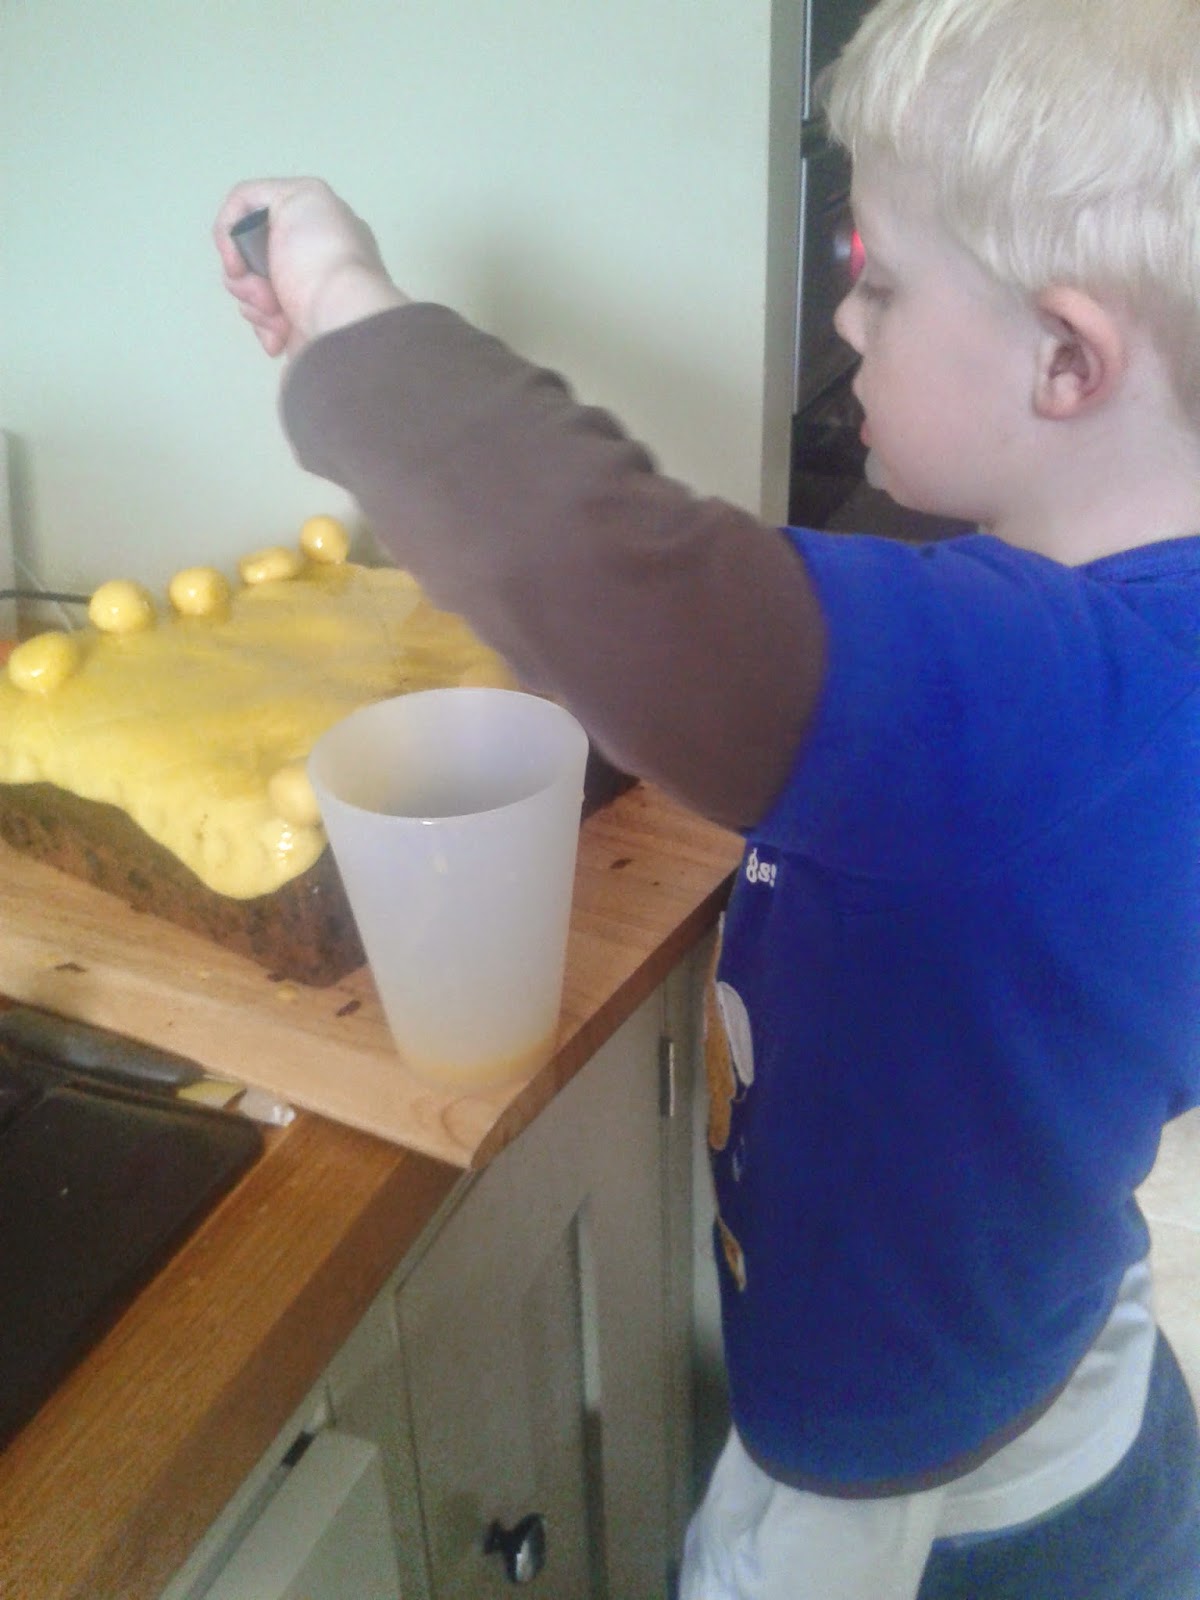
I started by making an Easter Simnel cake, something which I've heard about many times, but never baked or eaten.  It's similar to a Christmas cake, but has a thick layer of marzipan baked into the middle.  You pour half the cake mix into your tin, add the marzipan, and finish with the remaining mix.  It's baked, and then decorated with more marzipan.  The finishing touch is 11 balls of marzipan, arranged around the edge of the cake.  These represent Jesus' 11 disciples, with Judas missing as he was the betrayer.  The marzipan is egg washed, and toasted in the oven to brown.  Now, Rachel doesn't provide a picture of the finished cake, so I did a bit of hunting on the internet.  There seems to be a lot of variation... some are covered top and sides, some just on the top.  There are those decorated with chicks or mini eggs, and those that have stuck to the classic marzipan balls.  I decided just to marzipan the top, with a ribbon around the cake for decoration.  Evan picked a nest of Easter chicks to sit in the middle.  He was keen to help me decorate the cake, which was lovely, and rolled out all 11 balls.  Here he is, concentrating  hard on brushing on the egg wash...


Now, we had a bit of a disaster - when the cake was toasted, the marzipan balls melted and started sliding off the cake.  I have no idea why.  Perhaps the fan oven was a bit fierce?  I was really disappointed, as it looked lovely before that.  Ah well, good job I wasn't on Masterchef or the Bake Off.  Here is the finished cake (don't laugh!)


It did taste nice, and the pieces of hot cooked marzipan which slid off were delicious!  I'll try again next year, maybe lowering the temperature of the oven. 

Of course, we had traditional roast lamb for Easter Sunday lunch.  For afters, I cooked Rachel's 'baked brown sugar custards', AKA crème brulees.  My mum often makes these, and I've kept meaning to have a go.  I was given a kitchen blow torch around the time we got married - nearly 10 years - and believe it or not I've never filled it with gas.  Well, this challenge is all about making me try new things so, off to our local hardware store to fill it up.  The custards are really easy to make - you use a classic custard recipe in which you whisk eggs and sugar, then bring milk and cream to simmering point in a saucepan.  You pour the milk and cream onto the egg/sugar mix, whisking all the time.  The custard is poured into individual ramekins, and baked in a bain marie (water bath).  You can serve the puddings warm, or leave them to cool.  Either way, you sprinkle each with a little soft brown sugar just before serving.  Torch to your heart's content, until the sugar is crunchy.


I'll definitely make these again - they're so easy and can be waiting in the fridge until you need them. 

Easter Monday dinner was Rachel's 'Pork en croute with spiced cabbage stuffing'.  The cabbage is finely shredded, and cooked with cream; coriander; cumin; and mustard.  This gives great flavour to a vegetable which can often be bland.  It's stuffed in to a pork loin which has been split and opened out, and finally wrapped in puff pastry.  We all loved this dish, and it was especially appreciated after a long bank holiday walk/cycle ride.  Again, it didn't look pretty as the pastry split.  Must work on my presentation skills, but until then I'll just enjoy the flavours!


This weekend, I've also revisited Rachel's 'Bakewell bars' (see blog from 18th August 2014).  This time, I made them 'Mr Kipling' style, with icing and cherries on top.


Loved these! The bars were great without the extra topping, but it made a nice change.
 
So that's our Easter weekend!  We all feel as if we've eaten non-stop, and need to lighten up for the next few days!   But I've really enjoyed all the baking, as well as the eating.  I'll finish with one of the highlights of our weekend - Evan had his first turn to look after the school hens.  We had to let them out in the morning, put them to bed at night and top up their food and water.  They provided us with 6 eggs over the weekend, so fresh eggs for Easter breakfast.  They say you really appreciate your food when you know where it comes from, and that's so true.  Those eggs felt very precious, and tasted fantastic.  We're looking forward to our next turn!