Wednesday, 4 March 2015

Happy (belated) birthday blog!


Yes, it is a bit late!  This blog was a year old in January, and I haven't written anything since.  For that, I apologise.  I don't know when life got so busy!  Anyway, my 'new year's resolution' is to try and blog more regularly, hopefully at least once a week. 
 
 
I promise I've been keeping up the baking!  Here's what I've made over the last couple of months:-
  • Naan bread

  • Jammy steamed pudding

  • Corn bread

  • Brown scones with seeds
  • Baked potato, onion and rosemary gratin
  • Calzone

  • Crumpets

  • Baked red lentil dhal
  • Cardamom bread

  • Scheiterhaufen (bread and butter pudding with apple and white chocolate - A-Mazing!)

  • Crème Anglaise
Shout if you want me to write any of the recipes up, otherwise I'll try and fit them in when I have time.
 
Oh, Evan and I attempted to make a gingerbread house just after Christmas - this was to be my showstopper piece to put on the birthday blog post.  We managed to cook the dough and cut the pieces out, then it took about a week to get round to putting it together.  By that time, some of the pieces had crumbled and it just wouldn't stick together.  I got very frustrated, and ended up giving up.  Evan looked crestfallen for a second, until I said he could eat some gingerbread.   I've promised him we'll try again one rainy day! 
 
As for the next year, I have a plan!  I've made 53 recipes out of 139 - I make that 86 recipes to go.  I will complete the challenge, as I hate to be defeated! Most weeks, I'll be making at least 2 recipes to hit my target. Still some big challenges to go, including puff pastry; choux pastry; croissants and doughnuts.  Should be fun! 


Thought I'd tell you about one of my recent challenges, which is Seville orange curd.  I bought a batch of Seville oranges, originally intending to make marmalade again.  However, I saw this at the back of 'Bake' and thought I'd give it a go.  Really pleased with the result - it's deliciously rich and tangy.  I could eat it by the spoonful!  I made 2 batches, and used 1 in an orange meringue pie.  Took this for a church lunch, and it went down really well (thank goodness for church functions - they give me a great opportunity to share my bakes, instead of troughing them all myself!)

So, here's the recipe...

Simply take 150g (5oz) butter; 250g (9oz) caster sugar; the finely grated zest of 1 Seville orange and juice of 3.  Heat altogether, very gently until the butter melts.  Beat 4 eggs and 2 egg yolks together, then stir into the melted butter.  Stir carefully, over a very low heat, until the mixture is thick enough to coat the back of a spoon.  (It's really important to keep the heat low, or you'll get scrambled egg).  If the mixture starts scrambling, push it through a sieve (I did get a few lumps, despite keeping the heat as low as possible.  But a quick sieve sorted it out).  Remove the pan from the heat, and pour into jars. 

I think that's enough for now!  Back soon (I hope) with oat and vanilla shortbread cookies, and bacon and gruyere scones.
 

Thursday, 22 January 2015

Pizza

 
One from before Christmas here... sorry for the delay!
 
Evan really loves pizza, and we tend to have it when we need a quick, no-fuss tea.  However when Megan came along and started her feeding adventure, I had to think again.  Of course frozen pizzas are far too processed and salty for a small baby, so I've been making my own. No, this doesn't please Evan, who would rather have an el cheapo Margarita from the freezer!  He gets very excited when I say it's pizza for tea, then his face falls when he sees me making it... "Oh, Mummy, I don't want homemade!" 
 
 At least Megan and Daddy appreciate my efforts, and as they say, 2 out of 3 ain't bad! 
 
I started with Delia Smith's scone pizza recipe, which is really easy and super-quick.  You just sift 4oz self-raising flour into a bowl, then add 1/2 teaspoon of salt.  Rub in 25g margarine (or I sometimes use butter).  Mix together 2 tbsp milk and 2 tbsp water, and add gradually, to make a soft dough (you may not need all the liquid).  Now, at this point Delia instructs you to roll the dough into a circle.  I don't even bother with that part - instead, I just plonk the dough on a baking tray, and spread it with my hands until it fills it about evenly.  I will add that this recipe makes a fairly small pizza, and we tend to double or even treble the recipe for the 4 of us (perhaps we're just greedy!)
 
This is the pizza sauce recipe I tend to use... http://www.tastebook.com/recipes/3634463--Ultimate-Pizza-Sauce.  It does take a bit of time, but I usually make a large batch and divide it between freezer bags. 
 
Now to Rachel's pizzas!  Yes, they do take a bit more time but are well worth it - they look, and taste, just like an authentic Italian pizza.  They're topped with a fantastic roasted tomato sauce, which is really rich - sort of reminded me of Heinz tomato soup!  I don't really like using tomatoes out of season, but over the summer I'm going to try and make plenty and freeze it.  It will be great to have that summery flavour all winter long!  Rachel gives several ideas for additional toppings - I tried Gruyere cheese, thyme, roasted red onions, chorizo and goats' cheese.  Seriously delicious, although of course, not appreciated by Evan!  The great thing about making these however, is that they're supposed to prepared as individual portions.  So, everybody can choose their own topping, and all are happy!


Wednesday, 7 January 2015

Festive Baking


Hi all, happy new year!  This post feels distinctly un-seasonal now, with the festivities over and all the decorations down.  But Christmas turned out to be such a busy time, I've had no time to update the blog.  Maybe this will inspire you for the future!

I really thought Christmas wasn't going to happen this year... I'm always a bit last minute with the preparations but phew, this was a close call!  Evan was poorly for a fortnight at the beginning of December, with a nasty cold/flu type bug.  I sent him back to school twice, thinking he was better, but by lunchtime he'd crash out again and I'd have a phone call to pick him up.  Bless him, he really went through the mill.  He managed to miss his Christmas concert; disco; and Christmas at the Abbey Pumping Station - one of the highlights of his year.  Happily, he recovered in time for the last week at school and managed to enjoy a pantomime trip and visit from Santa himself.  At this point Nigel came down with the bug, so once again I was tied up doing school runs and trying to keep on top of things at home.  Suddenly, there was a week left to Christmas and I'd hardly done any shopping.  Much as I dislike shopping online, I had to resort to it in the end.  Things finally came together, as they always do, and we had 2 happy little ones who Santa was very good to.  I was very happy that Santa bought me a new laptop, and  hoping this will make my blogging much easier.  I've been using my tablet, and much as I love it in other ways, it doesn't seem to like Blogger.  The text has a tendency to jump about... I'll be typing away and it will suddenly end up in the middle of another sentence.  Plus, it won't seem to upload photos  - it just freezes in the process.  (If anyone is reading this and can tell me why, I'd be very grateful!)  I've had to upload photos from my phone, then go back to the tablet to input text, then back to my phone if I want any more photos.  Total PITA!  Hopefully, things will be a lot easier now.

Well, with all that time stuck at home I did manage to get a fair amount of baking done.  I started at the beginning of December, with some homemade candied peel.  This is something I probably wouldn't have attempted if it wasn't for the blog.  However, I'm glad I did as it's so much better than the shop bought version.  It's really easy - basically you take 5 oranges, 5 lemons and 5 grapefruit (or 15 of 1 fruit).  Cut the fruit in half and juice it, reserving the juice for another purpose.  I made a breakfast juice, although I needed to mix it with a lot of extra orange juice as it was really sharp.  Place the peel in a bowl, sprinkle with a tsp of salt and cover with cold water.  Soak for 24 hours.  You then remove the peel and place in a pan of fresh cold water.   Bring to the boil, and simmer gently for about 3 hours until it's really soft.  Then remove the peel from the pan, scraping out any remaining flesh.  In another large saucepan, dissolve 1.25kg caster sugar in 1 litre water.  Bring to the boil and dissolve the sugar.  Add the peel, and simmer for 30-60 minutes until 'candied'.  Cool slightly, and then place into sterilised jars.  Cover with the remaining syrup.  (I was a little unsure whether to chop the peel at this point - the recipe doesn't say to, but I suppose I'm used to the shop bought stuff.  In the end I left it whole, and it did look lovely in the jars).  Incidentally, I have 3 whole jars of candied peel left.  It's supposed to last about 3 months, so good for a while but not for next Christmas.  I'm not sure what I'm going to do with it so, if you're reading this and you'd like a jar (oh and live fairly close by), you can have one! 


I used the candied peel as the basis for homemade mincemeat, and from there made a few batches of Rachel's mince pies.  Here's where my KitchenAid really comes into its own - I quickly whizzed up 3 batches of shortcrust pastry, and had them all chilling in the fridge, ready for a spare 10 minutes to roll them out.  Here are a couple of the finished articles, warm and dripping with brandy butter.  Yum!


The candied peel also went into my Christmas cake (pictured top).  This is Rachel's variation on the traditional recipe, adding dates; apricots and some crystallised ginger.  She then covers it in homemade almond paste, and toasts it in the oven to add flavour.  I have to admit, it was a bit strange not to cover my cake in the traditional white icing, and Nigel thought it was unfinished.  We've both been enjoying it though!  Bit of a mishap with the cake covering... Rachel says to use half of the almond paste to cover the top of the cake.  I was super efficient, and weighed out exactly half, setting the rest aside.  Covered the top of the cake, no problem.  Then rolled out the paste to cover the sides - well, there didn't seem to be a lot, but I rolled it out thinly and I had just enough.  I wondered how on earth I was supposed to have enough to roll the stars out, but I managed to put some trimmings together and produce 3 very thin stars.  It was only when I was cleaning the kitchen afterwards, that I found the other half of the almond paste sitting in a bowl.  Oops!  On the whole though, I think the cake looked and tasted fine.  I've just been watching 'Rachel's Christmas Bake' on the Sky planner, in which she made this cake.  Delighted to see that mine looked very similar, if a bit lacking in stars!
 
Finally, I had a go at Rachel's stollen recipe.  This is something I always enjoy at Christmas, and have been meaning to make for a while.  It's an enriched bread dough, filled with mixed fruit; more candied peel; rum and spices (black pepper, coriander, cardamom and nutmeg - not a combination I've used in baking before, but a good one!)  After rising, it's rolled out and wrapped around a 'sausage' of marzipan.  It's then left to prove, and baked.  My first batch, unfortunately, was a disaster  It looked great up to the baking stage, but I left it for 40 minutes (as per recipe) and it overcooked.  The fruit tasted burnt and bitter, so there was no salvaging it.  I had a second go, baking it for only 30 minutes - even then it was well done, but tasted good.  (The hazards of having a fan oven I think... I lowered the temperature from 200 to 180C, but there's always a bit of guess work involved in this.  Next time I'll try 160)
 
 
So there you have it, my festive baking.  I've loved having lots of homemade treats around, and hope this will be the start of lots of bake-filled Christmases to come.  I'll try and plan it a bit better next time though - the stolen freezes beautifully so could be made well in advance.  The cake, of course, can be made a while before - and all the better for being drip fed alcohol for a few weeks!  Mince pies freeze well (I freeze them uncooked in the baking tin, and then tip them into freezer bags).  And the candied peel and mincemeat could be made as early as September.  (Mind you, I always say I'll be organised about Christmas and start the preparations early..it never happens.  Watch this space!)
 

Thursday, 4 December 2014

A Taste of Honey


My baby girl is 1!  How did that happen? They say time flies faster with your second child, and it really has gone by in a flash. We had a family tea party on the day, at which the centrepiece was a 'Scout Puppy' birthday cake... made to Rachel's recipe of course! Megan loved tucking into her party food, and snuggling up to her new baby dolly.


One of the few foods that babies shouldn't have under a year old, is honey.  It can contain a toxin which their little bodies just can't handle, resulting in a fatal infection.  Having passed this milestone, the weeks after Megan's birthday seemed a good chance to try out some of Rachel's honey recipes.  I have to admit to being a big honey fan.  There's something really soothing in its delicious sweetness.  It does have amazing healing properties - in my work as a nurse, I've used dressings impregnated with honey to aid wound repair.  A while ago, I watched a series called 'Doomsday Preppers' on National Geographic, about Americans who believe the end of the World is coming and are making plans to survive it (hello, end of the World, I think there's a clue there!)  Anyway, apparently beekeeping is an excellent thing to do.  Honey is such a great energy food, as well as a medicine and antiseptic, that it would be a great  'currency' to barter with... should you survive that long! It lasts forever, too... I read somewhere that perfectly good stores of honey have been found buried from Egyptian times!

Anyway, back to the present.  Firstly, I made 'Ginger and honey snaps'.  Well, they didn't turn out perfectly... for a start they didn't 'snap', but had more of a soft, cookie like texture.  I'm not sure what when wrong... Paul and Mary would not be impressed! Still, l enjoyed them and they went down extremely well with both children.  Evan enjoyed them as an after school snack, while practising his new found reading skills with me.  And Megan just frantically gestured towards the box every time she came in the kitchen.  

Pictured above, is my first batch of biscuits.  Again, I'm not sure what went wrong here!  Rachel says to roll the dough into balls, and space 5cm apart.  Well, I did that but the biscuits still spread and joined together.  Didn't make any difference to the taste, and I quite liked having square biscuits for a change!  Here's my second batch, looking more as they should...


Next, I tried out Rachel's 'Honey loaf'.  I loved this - it's a very simple recipe, but the warmth and sweetness of the honey really comes through.  Even the colour is rich and golden, like sunshine in a loaf!  I took it to a friend's house, and we enjoyed it still warm from the oven.  Yum!  Over the next few days, we all enjoyed it toasted for breakfast.  

You will need...
  • 300g (11oz) plain flour
  • 2 tsp baking powder
  • 1/2 tsp salt
  • 100g (3 1/2oz) butter, softened
  • 175g (6oz) runny honey
  • 2 eggs, beaten
  • 75ml (3fl oz) milk
  • 1 tbsp warm honey, for brushing

  • 13 x 23cm (5 x 9in) loaf tin


  1. Preheat the oven to 170C/325F/GM 3.  Oil and line the loaf tin with greaseproof paper.
  2. Sift the flour; baking powder and salt into a bowl.  Add the salt and set aside.
  3. Cream the butter in a large bowl, or in an electric food mixer, until soft.  Add the honey and beat until the mixture is light and fluffy.  Continue to beat, gradually adding the eggs.
  4. Fold in the flour with a spatula or metal spoon, then fold in the milk to form a soft dough.  Place in the prepared loaf tin, and bake in the oven for 45-55 minutes, or until golden, and when a skewer inserted in the centre comes out clean.
  5. Allow to stand for 3 minutes, then remove from the tin and place on a wire rack.  Brush the loaf generously with warm honey, and allow to cool.
I'll leave you with a final image from Megan's big day.  She was born unexpectedly on the bathroom floor, delivered by a shocked but very proud Granny (who is dining out on the story to this day!) So, we couldn't resist this photo opportunity, exactly one year later.  Luckily, we're all looking a lot cooler and calmer (and more dignified) this time!


Thursday, 13 November 2014

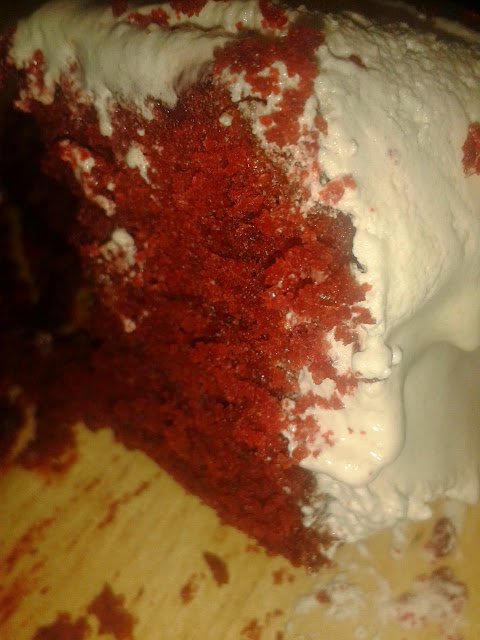
Red Velvet Cake


'This delicious treat has layers of vampy red cake contrasting with snowy white frosting.  The result is quite spectactular, both to look at and to eat.  A journalist once wrote in The New York Times that this is the Dolly Parton of cakes - rich and tacky, but much loved all the same!'
Rachel Allen, 'Bake', p57

And now for something completely different... before this, I hadn't even eaten Red Velvet Cake, let alone made one.  But that's what this project is all about!  I wasn't sure what to expect, but it really does have an unusual, literally 'velvety' texture.  And I loved the slight crunchiness of the frosting with all that soft sponge.

Well, last month we had a ladies social event at church.  It was our first one - the men had been out for a meal so we thought it was our turn!  It went really well - we played some silly games (which not everyone quite understood, making them even more silly!)  And we ate cake!  Jenny, our minister's wife, had very kindly organised the evening... and asked everyone to bring a pudding.  Which meant  a large array of treats! I decided the Red Velvet would be perfect for a girlie get-together.  It went down really well, although there was plenty left due to stiff competition! Therefore, it came out again on Sunday, at coffee time after the service.  I took no responsibility for the effect of all that food colouring on the kids! 

My friend Sonia made the comment that "it's very nice, but you have to wonder who thought of it?  I mean, why not blue velvet?!"  

Hmmm, good point!  Well, after some hunting around the internet, this seems to be the best explanation of its origins

http://mentalfloss.com/article/48990/how-red-velvet-cake-got-its-name

So, here goes with the recipe...

  • 150g (5oz) butter, softened
  • 300g (11oz) caster sugar
  • 1 tsp vanilla extract
  • 3 eggs, separated
  • 250g (9oz) plain flour
  • 25g (1oz) cornflour
  • 1 tsp baking powder
  • 2 level tbsp good quality cocoa powder
  • 250ml (9 fl oz) buttermilk
  • Red food colouring (use 2 tbsp liquid colour or 1/2 tsp thick red food paste) *
  • Pinch of salt
  • 1 tsp white wine vinegar
  • 1 tsp bicarbonate of soda


For the frosting
  • 2 large egg whites **
  • 250g (9oz) caster sugar
  • 50g (2oz) golden syrup
  • Pinch of salt
  • 1/4 tsp cream of tartar
  • 2 tbsp water
  • 1 tsp vanilla extract


  • 2 x 23cm (9in) diameter sandwich tins, each about 5cm (2in) deep

Method
  1. Preheat the oven to 180C/ 350F/ GM4.  Butter and flour the sides of the cake tins, and, Iine the bases with parchment paper.
  2. Cream the butter in a large bowl or electric food mixer, until soft.  Add the sugar and beat until the mixture is pale and fluffy.  Add the vanilla extract and egg yolks, one by one, beating after each addition.
  3. Place the flour, cornflour, baking powder and cocoa powder in a sieve resting in a plate.  Measure the buttermilk with the food colouring and mix together.  It should be very red, so add more if you need to.
  4. Sift one-third of the dry ingredients into the butter and eggs mixture until just combined, then pour in one-third of the buttermilk mixture and mix until just combined.  Continue, combining a third at a time, until both are incorporated.
  5. Whisk the egg whites and salt in a large, spotlessly clean bowl until stiffish peaks form.  Add one-quarter to the batter and mix.  Add the remaining egg whites in 3 stages, folding them in gently with a large metal spoon until just incorporated, leaving as much air in the egg whites as possible.
  6. In a small bowl, mix the vinegar and bicarbonate of soda until it bubbles up, then gently fold this in to the batter.  Quickly pour the batter into the prepared tins, and smooth the tops.  Bake in the oven for 25-30 minutes, or until a skewer inserted into the middle comes out clean, and the cake feels slightly springy on top.
  7. Leave in the tins for 15 minutes, then carefully remove the cakes from the tins, running a table knife or palette knife slowly around them, and invert onto a wire rack to cool.
  8. To make the frosting, place the egg whites; sugar; golden syrup; salt; cream of tartar and water in a heatproof bowl over a saucepan of simmering water (the base of the bowl should not touch the water).  Bring the water to a steady simmer.  With a hand-held electric beater or balloon whisk, whisk until you have shiny, satiny soft peaks.  Remove the bowl from the simmering water, and continue to whisk for a further 2 minutes - it will get a bit stiffer.  Whisk in the vanilla extract.
  9. Immediately ice the middle, top and sides of the cake with a palette knife, fluffing the frosting up to form little peaks all over the cake.  You need to work fast to ice the cake, as the icing sets very quickly.   Leave for at least 30 minutes, to allow a thin crust to form outside a creamy interior.
* Be warned, this cake uses a shocking amount of food colouring.  I initially bought a tube of red gel colouring, but after putting it all in, the cake was merely pale pink.  Quick trip to the shops to buy a bottle of liquid colouring, and about half a bottle later I had the right colour! I personally think it's worth it for a treat, however I recently came across this recipe from Bake-Off winner Jo Wheatley.

http://www.josblueaga.com/2012/04/raspberry-red-velvet.html 

She uses pureed raspberries to create the lovely red colour, so that's an alternative you might like to try. 

** I used the egg whites that I had frozen from my almond praline cake, a ccouple of posts back.

On a different subject,  I had a lovely surprise today.  If you've seen my baked cheesecake posts, you'll know that I addded some yoghurt from 'The Collective Dairy Company'.  Well, I thought I'd drop them an email with links to the recipes.  They mailed back to say how much they liked them, and asked for my postal address.  I've just received a lovely 'thank you' parcel with vouchers and an apron.  So kind, and totally unexpected! 


Wednesday, 5 November 2014

Bonfire night cheesecake


Bit of an experiment here, but one which I'm really pleased with.  If you look back to July, I made Rachel's baked cheesecake, substituting a luxury yoghurt for some of the cream cheese.  It worked so well that I decided to try another variation.   Again, I had a really nice yoghurt from the 'Collective Dairy Company', this time spiced pumpkin flavour.  Perfect to try out for our bonfire party! I used 2 tubs of Philadelphia (360g) and then made up the remaining 90g with yoghurt.  As a finishing touch, I made up a portion of Rachel's toffee sauce, and spread this over the biscuit base.  I left it to cool and thicken a little before pouring over the cheesecake filling.

I was surprised at how much the toffee sauce bubbled up around the cheesecake filling.  It didn't look the neatest, but gave a lovely, slightly chewy crust, in contrast to the soft cheesecake filling.  Really chuffed with it, my experiments aren't usually so successful!

If you'd like Rachel's toffee sauce recipe, here it is.  Very simple, and keeps for ages in the fridge.  It's lovely with ice cream, sticky toffee pudding, waffles, etc etc.  Rachel's books also give salted caramel and boozy versions!

Simply take...

  • 110g (4oz) butter
  • 250g (9oz) soft light brown sugar, or half brown and half caster
  • 275g (10oz) golden syrup
  • 225ml (8 fl oz) double cream
  • 1/2 tsp vanilla extract


Place everything in a saucepan, over a high heat.  Boil for approximately 4-5 minutes, stirring regularly until thickened.

Easy peasy!

Almond Praline Cake


'This delicious cake has been made at Ballymaloe for many years.  It keeps very well, due to the large amount of nuts it contains and because the icing keeps the moisture in the cake.  It is ideal for a special tea party'
Rachel Allen, 'Bake', p65

Wow, this was amazing and I think, my favourite recipe so far from the book. It was also the most complicated, but well worth it.  I made it for a diamond wedding party, at which we were all asked to contribute a dessert. 60 years married, what an amazing achievement! Definitely warrants a special bake.  Not everything went to plan, but still my cake received plenty of compliments. Here goes with the recipe...

  • 225g (8oz) butter, softened
  • 225g (8oz) caster sugar
  • 4 eggs
  • 225g (8oz) plain flour
  • 1 tsp baking powder
  • 3 tbsp almond praline (see below)
  • 1 tbsp milk


For the praline
  • 250g (9oz) caster sugar
  • 250g (9oz) unskinned (unblanched) almonds


For the praline buttercream icing
  • 125mls (4fl oz) water
  • 350g (12oz) caster sugar
  • 7 egg yolks*
  • 350g (12oz) butter (preferably unsalted), softened
  • 1 tsp vanilla extract
  • 6 tbsp almond praline


  • Two 20cm (8in) diameter sandwich tins


  1. Preheat the oven to 180C/350F/GM4.  Butter and flour the sides of the tins, and line each base with parchment paper.
  2. To make the praline, place the sugar in a non-stick pan or medium saucepan with low sides, and scatter the nuts over.  Set over a low heat until the sugar turns a caramel colour.  Do not stir, but you may carefully 'swirl' the pan to allow the sugar to caramelise evenly.
  3. When the caramel has turned a deep whisky colour, pour the mixture onto a baking tray lined with parchment paper and allow to cool.  When the praline is cool and hard, place in a food processor and whizz to a gritty powder.  Alternatively, place the praline in a plastic bag and crush with a rolling pin **.
  4. To make the cake... Cream the butter in a large bowl or electric food mixture until soft.  Add the sugar, and beat until light and fluffy.  Add the eggs one by one, beating well between each addition.  Sift in the flour and baking powder, and stir in gradually.  Add 3 tbsp crushed praline and mix lightly, adding the milk to moisten.
  5. Divide equally between the 2 tins, and bake for 25-30 minutes, or until a skewer inserted into the centre of each cake comes away clean.  Allow to cool for a few minutes, before turning onto a wire rack.
  6. Meanwhile, make the buttercream icing.  In a low-sided medium saucepan, bring the water and sugar to the boil, stirring until the sugar dissolves.  Turn the heat up high, and let the syrup boil for 4-5 minutes, to the 'thread' stage, when the last few drops that fall from a metal spoon dipped into the syrup come off in one long, quite thick and syrupy thread ***.
  7. While the syrup is boiling, beat the egg yolks for 1 minute with an electric hand-held beater or an electric food mixer, then very gradually add the hot syrup.  Continue beating until all the syrup is added and the mixture has cooled.  The consistency should be stiff, mousse-like and able to hold a figure of eight pattern made by the beater ****.
  8. Place the softened butter in another bowl and beat well with a hand-held electric beater until very soft.  Continuing to beat, gradually add the mousse, a spoonfull at a time.  Then stir in the vanilla extract and 6 tbsp of the crushed praline.
  9. To assemble, slice each cake in half horizontally.  Spread the inside of each sparingly with butter icing and sandwich together, stacking each layer above the other as evenly as possible.  Brush all over the cake to remove any crumbs *****.
  10. Ice the top and sides with the remaining icing.  Sprinkle the remaining crushed praline all over, including the sides.

* As you'll see, this cake uses a lot of eggs - 4 whole and 7 yolks!  Luckily I got a big box from my old friend, Co-op bargain shelf!  I didn't have time to make anything with the spare whites, so I froze them. I put 2 at a time into small pots (the cube types you get for small portions of baby food). They froze really well, and I used some for my Red Velvet Cake... coming on the blog soon!

** This recipe made loads of praline, with plenty left over.  I've kept some in an airtight container, maybe to make another cake one day (although I have to admit to having a sneaky nibble now and again - the caramelised nuts are delicious!) Could make a nice party nibble :-)

*** Not sure what happened to my sugar syrup, but it just wouldn't get to the thread stage.  After boiling it for ages, I took the pan off the heat and the sugar immediately crystallised into a sticky ball.  I really didn't want to waste all that sugar, so just put in some tap water and boiled it again to dissolve the sugar.  There I left it, not attempting to get to the 'thread stage' again.  When I met Rachel, I asked her about this... she wasn't sure what had gone wrong.  However, on the same trip to Cheltenham I bought myself a sugar thermometer.  Looking forward to trying it out!

**** Another minor mishap here... I just couldn't get my mousse to the 'figure of eight' stage.  Maybe because the syrup hadn't thickened as it should.  So, the buttercream was thinner than it probably should have been.  Still, it tasted lovely, nobody knew the difference and I wasn't telling!

***** I don't think the cake rose as well as it should... again I'm not sure why but the cakes looked too thin to slice in half.  So, I left them whole and just sandwiched the 2.

This cake looked like a 'recipe for disaster' at a few stages.  However, I think it's a lesson in not giving up.  It was definitely worth persevering, and I'm looking forward to having another go.  By the way, the photo doesn't do it justice!

Wednesday, 15 October 2014

Snickerdoodles


'A somewhat soft and cakey biscuit with a spicy, autumnal flavour'
Rachel Allen, 'Bake', p25

Another milestone reached in the French household last month, as my little man started school!  His first few sessions were less than 2 hours - by the time I'd got home and had a cup of tea it was time to go back! A few people asked me if I'd cried on his first day... I had to say no, firstly because I was excited for him and secondly because he was gone for less time than his pre-school sessions!  Anyway, after a week he went for his first full day.  I decided to go all earth-mother and make him a special snack for his return home... these seemed to fit the bill!  They were quick and easy to make, between household chores and looking after Megan.  And I reallly like the cake/biscuit hybrid.  Evan appreciated them too, which I certainly can't say for all my cooking! He was delighted the other day when watching Baby Looney Tunes, to hear that the characters were eating Snickerdoodles too!

  • 125g (4 1/2oz) butter, softened
  • 110g (4oz) caster sugar, plus 1 dstsp extra, for rolling
  • 1 egg, lightly beaten
  • 1 tsp vanilla extract
  • 250g (9oz) plain flour
  • 1/2 tsp freshly grated nutmeg
  • 3/4 tsp baking powder
  • Pinch of salt
  • 1 dstsp ground cinnamon
  1. Preheat the oven to 180C/350F/GM 4. 
  2. Cream the butter in a large bowl or in an electric food mixer, until soft.  Add the 110g (4oz) caster sugar and beat until the mixture is light and fluffy.  Beat in the egg and vanilla extract until combined.
  3. Sift in the flour; nutmeg; baking powder and salt, and gently mix together to form a dough.
  4. Mix the dessertspoon of sugar and the cinnamon together in a medium-sized bowl.  Using your hands, roll the dough into walnut-sized balls then roll in the sugar and cinnamon mixture and place on 2 baking trays (no need to grease or line), each ball spaced about 3cm (1 1/4in) apart.  Flatten them down with the palm of your hand.
  5. Bake in the oven for about 15 minutes, or until they feel firm around the edges.
  6. Allow to stand for  2 minutes on the baking trays, then carefully transfer to a wire rack to cool.
I'll finish here with a picture of my handsome chap on his first day at school.  You wouldn't believe the coercion it took to have this taken (and that was just me!)

Wednesday, 8 October 2014

Carrot cake, and one fantastic day!


'Who doesn't love this classic cake? It's perfect just as it is with a cup of tea or coffee, but you could also try decorating it with candied violets to add a little visual 'oomph'
Rachel Allen, 'Bake', p67

OK, spot the deliberate mistake.  That's obviously not my carrot cake - it all got eaten before I remembered to take a photo.  You'll just have to trust me that I did make it!  One day in the summer holidays, Evan had 3 of his best pre-school friends (and their mummies) round to play.  The boys had a wonderful time running around, and splashing in the paddling pool... even though it wasn't very warm.  We mummies shivered just watching them, had a good chinwag and of course, ate cake!  

I'm not going to put the recipe here, as it's such a classic, most people have probably made something similar.  It's such an easy recipe - more or less throw it all in.  Grating the carrots is a bit of a faff, but the rest is simple.  Mind you, I have made carrot cake before and it didn't turn out so well.  I think I was a teenager then, the sponge turned out fine but I didn't beat the cream cheese well enough.  I was left with cheesy lumps in the icing, not pleasant!  Anyway, this time I made sure to give it a good beating and it was much better!  I didn't have time to try the candied flowers, but promise to try them out sometime as part of this challenge!

Right, on to yesterday.  If you read my previous blog post, you'll know that I was going to have lunch with Rachel herself! We enjoyed a 2 course menu, both of which were Rachel's recipes...


Wow, what an amazing lunch! I've never eaten Quinoa before, but definitely will again.  The lamb koftas had a lovely warm combination of spices.  And a delicious pudding too, the blueberries cutting through the richness of the bread.  As the event was sponsored by Bottlegreen drinks, the custard had Bottlegreen cordial running through it - an unusual touch but one I really liked.

After lunch, Rachel came out and did a talk about life at Ballymaloe; her new book; and the challenges of balancing a hectic working schedule with family life.  Following that, she was signing copies of her new book, 'All Things Sweet'.  Mum treated me to a copy as an early Christmas present, hooray lots more bakes to try.  Just need to magic up some more hours in the day!  Then on to the book signing.  I rather cheekily presented Rachel with both my new book and my copy of 'Bake', by now a bit tatty.  As soon as Rachel saw it, she said she loved how well used it was... which led me to talk about the blog.  She seemed genuinely interested, so much so that she now has the blog address.  Eek, no pressure or anything!  My 'Bake' book now has a very special addition...


What a lovely touch, I will treasure it always! As expected, Rachel was very easy to talk to and didn't seem to mind answering my baking questions.  I asked her why the fruit failed to sink in my Dutch Apple Cake... apparently floury apples such as Cox's don't sink.  Oh, and a question about my Almond Praline Cake... but I haven't blogged that one yet!

On that high, Mum & I spent a lovely few hours shopping in Cheltenham before returning to collect Megan from Great Granny's house.  She had been a little star for Grandpa and Great Granny, so a good day all round!

So after all that, I feel I have a new impetus for my challenge (which had slowed up a bit). Rachel if you do by any chance read this, I really appreciated your time and hope I'll do 'Bake' proud.

Back soon, with some 'new school' biscuits, almond praline cake and red velvet cake.  Tatty bye!

Monday, 6 October 2014

Baked aubergines with tomato, basil & pine nuts... oh and some exciting news!


'Best made in the summer with fresh basil and really ripe tomatoes, this is a lovely dish served on its own or as an accompaniment to roast lamb or chicken.  Try adding a few chopped anchovies or olives into the sauce'
Rachel Allen, 'Bake', p190

I made this dish one evening in the summer holidays (Yes, I really am that behind on my blog. Seems like a world away now, with the rain lashing down outside and the temptation to put the central heating on!) On that far off day, Evan had gone to stay at Grandma's for the night and Nigel was out working.  Evan is still a really fussy little soul, so this was a good opportunity to try something new without him moaning. Megan is still at the stage where she'll try most things, so I like to offer her as many new tastes as possible, and we very much enjoyed our meal for 2. I served it with pasta, to make it a more substantial dish... actually it would have been filling on its own.  I love really fresh Mediterranean flavours, so this was definitely a dish for me!
  • 2 large aubergines
  • Salt and freshly ground black pepper
  • 4 tbsp olive oil, plus extra for drizzling
  • 1 onion, peeled and finely sliced
  • 2 cloves of garlic, peeled and crushed or finely grated
  • 650g (1lb 6oz) good red ripe tomatoes, peeled and chopped
  • Pinch of chilli flakes
  • 1 tsp caster sugar
  • 4 tbsp chopped or torn basil leaves*
  • 1 ball of mozarella, torn into pieces, or 25g (1oz) grated Parmesan (optional)
  • 4 tbsp pine nuts, lightly toasted (in the oven for a few minutes or in a saucepan, over a medium heat)


  1. Preheat the oven to 180C/350F/GM4.
  2. Slice the aubergines in half lengthways and, using a teaspoon, scoop out the flesh, leaving a 5mm (1/4in) border around the edge intact.  Chop the flesh, then place in a sieve sitting over a bowl, adding a good pinch of salt to draw out any bitter juices.  Place the aubergine halves on an oiled baking tray, drizzle with a little olive oil and cook for 15 minutes.
  3. Meanwhile, heat the olive oil in a saucepan, add the onion and garlic, cover and cook over a low heat for 10 minutes, stirring every now and then, until the onion is soft.  Add the drained aubergine flesh, the tomatoes, chilli flakes and sugar, and season with salt and pepper.  Cook over a low heat for about 25-30 minutes, or until the sauce is reduced.  Add the chopped basil and season to taste.
  4. Spoon the tomato sauce into the par-cooked aubergines, then add the torn mozarella or Parmesan (if using).  Bake in the oven for about 30 minutes, or until the aubergine is cooked at the sides and the mixture is hot and bubbling.  Sprinkle with the toasted pine nuts, and serve.


* I'd love to have a herb garden of my own, given more hours in the day.  Until then, I'm reliant on the supermarket variety.  I usually buy the growing pots when they're reduced (good old Co-op bargain shelf again!) I chop the leaves and keep them in re-usable containers in the freezer.  All ready to drop straight into whatever I'm cooking!)

OK, now to the exciting news, drum roll please... (any guesses?)... well, it is most definitely blog related.  Tomorrow I'm having lunch with Rachel herself.  No, really!  She's at the Cheltenham Literature Festival, promoting her new book, 'All Things Sweet'.  It's advertised as 'Lunch with Rachel', so I presume she's doing some sort of talk.  Maybe I'll even get to ask a question! I'm going to have to look back over my posts! Actually I have met Rachel once before, at the BBC Good Food Show. She came across as very down to earth and personable, just as she does on TV.  I've persuaded my Mum to come too (didn't take much!) so very much looking forward to a girlie day.  We're meeting at my Granny's house in Evesham, where Megan is being deposited for a fun day with Grandpa and Great Granny. Nigel and Evan are plotting some boy time after school, so everyone should be happy.


The dessert is a recipe from Rachel's new book.  Might just come back with a copy tucked under my arm!

Hope to be back soon, with lots to tell you. Bye for now!


Wednesday, 1 October 2014

Daddy's birthday cake


'This is such a great, simple, yet versatile chocolate cake. Add the finely grated rind of 1 orange to give the cake a chocolate orange flavour, or replace the vanilla extract with 1 tbsp of instant coffee powder for a mocha flavour.  This can also be turned into chocolate cupcakes if you wish - the recipe will fill 12 paper cases in a cupcake or muffin tray, and will take about 18-20 minutes to cook.  Ice them generously with the chocolate buttercream and decorate to your heart's content'
Rachel Allen, 'Bake', p69

In early August, my husband turned 40, ahem, something.  He asked for a chocolate birthday cake, so it was a perfect opportunity to try out Rachel's recipe.  Evan and I had a great time making it together.  I love it when Evan asks to bake - he's not really one to sit down and do colouring or crafty activities, so it's nice to have this time together... even if all he really wants is to lick the bowl! We decorated the cake with melted chocolate, and sprinkled it liberally with milk and white chocolate stars.  Here's the recipe...

For the cake
  • 125g (4 1/2oz) dark chocolate
  • 3 tbsp milk
  • 150g (5oz) butter, softened
  • 150g (5oz) caster sugar
  • 3 eggs
  • 200g (7oz) plain flour
  • 1 tbsp good-quality cocoa powder
  • 1 tsp baking powder
  • 1/4 tsp bicarbonate of soda
  • Cocoa powder or icing sugar, for dusting (optional)


For the chocolate butter icing
  • 75g (3oz) butter, softened
  • 1 tbsp cream
  • 1 tsp vanilla extract
  • 175g (6oz) icing sugar
  • 1 tbsp good-quality cocoa powder

  • 2 x 20cm (8in) diameter sandwich tins


  1. Preheat the oven to 180C/350F/GM 4.  Butter and flour the sides of the sandwich tins, and line the bases with greaseproof paper.
  2. Place the chocolate and the milk in a bowl, sitting over a saucepan of gently simmering water and heat until the chocolate has melted.
  3. Beat the butter until very soft, then add the caster sugar and continue to beat until the mixture is light and fluffy.  Beat in the eggs, one at a time, then fold in the melted chocolate.
  4. Sift in the flour; cocoa powder; baking powder and bicarbonate of soda, and fold in gently to mix.  Divide the mixture between the tins, and bake in the oven for about 25 minutes, or until a skewer inserted into the middle of each cake comes out clean.
  5. Remove the cakes from the oven, and allow to sit for a few minutes before turning them out of their tins and placing them on a wire rack to cool.
  6. While the cakes are cooling, make the chocolate butter icing.  Beat the butter; cream and the vanilla extract until very soft.  Then gradually sift in the icing sugar and the cocoa powder, beating all the time, until it is all added.  Continue to beat until very soft, then whisk the mixture until it is light and fluffy.
  7. Once the cakes are cool, sandwich them together with the chocolate butter icing.  Place the cake on a plate or a cake stand and dust with cocoa powder or icing sugar, if you wish.
The cake came out really well, Daddy loved it and it was great to see the pride in Evan's face when he presented it to him.  It reminded me a lot of a chocolate cake that my Mum used to make - it was her party piece  (I've noticed that everyone's mum has their party piece - my mother in law always does a trifle; a friend's mum does a mean fruit cake... hmmm, I haven't found mine yet.  Maybe one of Rachel's recipes will become my 'piece'!)  If you'd like an alternative recipe, here it is and it's extremely easy...

Simply mix together 6oz self-raising flour; 6oz margarine; 6oz caster sugar; 3 large eggs; 1 tsp bicarbonate of soda; 1 tbsp hot water and 2 dessertspoons of cocoa powder.  Place into 2 round cake tins, then bake at 140C for about 20 minutes.  Turn onto a wire rack to cool.  Make up a chocolate buttercream using 2oz margarine; 4oz icing sugar and a little cocoa or melted chocolate.  Sandwich the cakes together with the buttercream, and decorate with melted chocolate.

Easy peasy! The credit goes to Stork margarine, as Mum got it from a Stork tub many years ago (hence the imperial measurements!) She lost the original recipe for a while, and was making it from memory.  It wasn't until she found the original, that she realised she'd been missing out the bicarbonate of soda for years.  It hadn't affected it! As for me, I've made it quite a few times and it's never failed.  Well, maybe just once.  Last year, an elderly lady who I knew very well from church, passed away.  We were all asked to contribute a cake for the funeral tea, and this is what I picked.  It totally refused to rise, even though I tried 3 times to bake it.  Agnes had a very dry sense of humour, and I'm sure she was playing tricks on me from on high! Anyway, I sandwiched 4 thin layers of cake together and nobody knew any different!

Tuesday, 23 September 2014

Light sweet scones


'My friend Oisin makes these divine scones. He uses a very light Italian flour, but you can use plain flour if you wish' 
Rachel Allen, 'Bake',  p31

In late July, we spent a lovely couple of days in Sutton on Sea, one of our nearest coastal resorts.  We were joined on the first day by Nigel's parents and nieces, so Evan had a wonderful time, frolicking in the sand with his cousins.  These scones were my contribution to our picnic lunch - filled with strawberry jam and clotted cream, of course!  I've never had much luck with scones before, but these really were light and well risen.  Everyone was very complimentary, including my mother in law, who is a longstanding member of the WI.  I'm sure she's tasted a few scones in her time! I used the light Italian flour, which Rachel suggests.
  • 500g (1lb 2oz) light Italian, or plain flour
  • 1 rounded tsp bicarbonate of soda
  • 2 rounded tsp cream of tartar
  • 1 tsp sea salt
  • 125g (4 1/2oz) unsalted cold butter, cubed (If you are using salted butter, decrease the salt to 1/2 tsp)
  • 25g (1oz) caster sugar
  • 1 egg, beaten
  • 275ml (9fl oz) buttermilk or milk, plus extra for the egg wash
  • 50g (2oz) caster or granulated sugar (optional)

6cm (2 1/2in) cutter

  1. Preheat the oven to 220C/425F/GM 7.
  2. Sift the flour; bicarbonate of soda; cream of tartar and salt into a large bowl.  Using your fingertips, rub in the butter until the mixture resembles breadcrumbs.  Add the sugar and mix well.
  3. Set aside about a third of the beaten egg, and combine the rest with the buttermilk, then add to the flour mixture and mix briefly to combine into a moist dough.  Place on a lightly floured work surface, and knead ever so slightly to bring together, then press or roll out to a thickness of 2cm (3/4in)
  4. Using the cutter, cut out approximately 12 scones and place on a floury baking tray.  Add about a teaspoon or so of buttermilk to the remainder of the beaten egg, to make an egg wash.
  5. Brush the scones with the egg wash (and dip the tops in sugar if you wish) then bake in the oven for 10-12 minutes, or until golden brown on top.  Eat as soon as possible!
Rachel also suggests variations of cinnamon; orange; chocolate chip; sultana; cranberry or blueberry scones.  Definitely going to try some of these! Maybe a chocolate/orange combo would be good!

When cutting scones, I've heard that you should never twist the cutter as it stops them rising.  Can't remember for the life of me where I heard that - probably on the Bake Off.  Neither do I know the science behind it! But thought it would be a good tip to share with you all xx

Tuesday, 26 August 2014

Beginner's guide to breadmaking


So, who's enjoying the new series of Bake Off? Me, me, me!  I don't know what's behind the success of this little series... is it the ding dong battle between Paul and Mary, where she always balances his fiercest criticism with some kind words? Is it the different characters featured, some of whom seem very unlikely bakers? Or is it just that we all love a good slice of cake?! Whatever the reason, The Bake Off seems to have gripped the nation.  And in honour of last week's episode, I thought I'd write a blog on bread.

Firstly, a disclaimer.  I'm certainly no expert on breadmaking, really I'm a beginner myself. I just thought I'd share some of the tips that have helped me to get started.  I've picked these up from 3 sources.  Firstly, Rachel (obviously!)  Secondly, Paul Hollywood's 'Bread' book which I had for my birthday last year.  This has some really good pictorial guides, and he also suggests a meal to make out of each bread... so it's a really useful cookbook.  I went to see Mr Hollywood at De Montfort Hall in May, and had a great evening.  At one point they asked for volunteers to bake on stage with him.  I put my hand up, and my Mum, sitting next to me, looked horrified. 

 "Oh Heidi, you wouldn't?!"

Oh I would, I'd have loved it! Unfortunately for me, but fortunately for my Mum's embarassment, I didn't get picked.

Thirdly, a couple of years ago I did a breadmaking course at 'Jacques Bakes Cakes' in Hinckley. Now, my previous experience of cookery lessons had been in school.  I had some really scary teachers, and as I'm not the most practical person I often found myself getting shouted at.  At 14 (when school cookery lessons finished) I'd decided I was a rubbish cook. I only really started to enjoy it when I was away at university, and had to fend for myself.  So it was with some trepidation that I walked into Annaliese Jacques' cookery school.  As it happened, she turned out to be the antithesis of the scary school cookery teacher, as you can see...

As you can imagine, Annaliese's lessons were a lot of fun! She was patient and encouraging, and I went home with a yeast loaf; a soda bread and a batch of bread rolls which I was very proud of! I can highly recommend Annaliese's classes.  She doesn't just teach breadmaking either... she does cupcakes; macaroons; sugarcraft; preserves and more.  Her website can be found at www.landgirlscookeryschool.co.uk (They've moved premises since I went, and changed the business name)  I think my dear husband would quite like to do a course after seeing that picture of Annaliese with her... ahem... baps!

Right, to the point.  This is how I'd make a basic loaf.  The quantities are Rachel's, but the method is a mixture of what I've picked up.  Here goes...

  1. In a measuring jug, mix 2 tsp sugar with 150mls (1/4 pint) warm water and some yeast - 2 1/2 tsp dried; 20g (2/3oz) fresh; or 1 1/2 x 7g sachets fast-acting.  Let it stand in a warm place for 5 minutes, or until frothy.  If using fast-acting yeast, there's no need to let the mixture stand.
  2. Place 750g (1lb 10oz) strong white flour into a bowl.  Paul says there is really no need to sift flour for breadmaking, as modern flours are of such good quality.  Add 2 tsp salt.  Then, rub in 40g (1 1/2oz) chilled butter, and rub in until it resembles fine breadcrumbs.  Alternatively, you can add 4 tbsp olive oil.  In this case, make a well in the centre of the flour and pour the oil in.  Then, pour in the yeast mixture.  Take about 275mls water, and gradually add it, to create a soft dough  (You may not need it all).  When mixing in the water, keep your fingers stiff and outstretched - like a claw.  You aren't kneading at this point, just combining the ingredients.  
  3. KNEADING Turn the dough out on to a lightly oiled or floured surface.  Just be careful if using flour, as too much will affect the recipe and your bread may not work!  I've gone wrong here in the past, so for that reason I prefer to use oil.  The dough will feel slightly sticky, but that's OK.  Stretch out the dough, fold it in to the centre and flatten it again, before turning.  Keep stretching; folding; flattening and turning for about 10 minutes.  You will feel the dough getting smoother and stretchier, 'like chewing gum' says Annaliese.  To test when you've kneaded enough, pull out a small piece of dough - it should stretch to at least 20cm without breaking. (Note that you can do all your kneading in a food processor fitted with a dough hook.  This should take about 5 minutes.  Be careful as it's easy to over-knead dough this way.  It's almost impossible when kneading by hand).
  4. RISING Now, place your dough into a large, lightly oiled bowl.  Cover with a clean tea towel or cling film.  This protects the dough from draughts, and stops a skin forming on it, which would slow the rise.  Don't worry about putting the dough in a warm place, room temperature is fine.  A very warm environment would create a fast rise, and you don't want that.  The slower the rise, the tastier your bread will be (We once tried to make a fast, 1 hour bread in our breadmaking machine.  It was only fit for the birds, and I don't think even they were too impressed!)  So, leave your bread for 1-3 hours.  During this time, the yeast will be feeding on nutrients in the flour and producing carbon dioxide, which makes the bread rise.  Magic! The dough will double, treble or even quadruple in size.  You will eventually see creases starting to form in the top, and you'll know it's about ready.  Don't leave it too much longer, or you'll have a bitter; over-fermented bread.
  5. KNOCKING BACK Turn the dough out, and then knock it down to release any air pockets.  (The idea of this is to create bread with a uniform texture).  Knead for 2-3 minutes, to get the yeast working again.  Then, fold the dough in on itself several times to create structure.  'Like folding paper' says Paul - the more times you fold it, the stronger it becomes.  Allow to rest for 10 minutes before shaping.
  6. SHAPING Divide the dough in half (Rachel's recipe creates 2 loaves).  Shape each loaf into an oval, about 23cm (9in) long, before placing into a lightly oiled 13 x 23cm (5 x 9in loaf tin). Try to keep the dough taut and even as you shape it, as this will help to create structure.  You could also shape the bread into rolls or a plaited loaf (haven't tried this yet, but I do intend to as part of the challenge!)  Now, place a roasting tin in to the bottom of your oven, and preheat to 220C/425F/GM 7.  Nearly there!
  7. PROVING This stage develops aeration and structure in your loaf.  Place the loaf tin inside a large plastic bag (I use a clean bin bag).  You need to form a sort of 'tent' over the loaf, so it has room to rise.  This stage should take about 30 minutes.  When the dough is fully proved, it will spring back slowly when pressed. 
  8. BAKING Place your loaf into the preheated oven, and as you do so pour about 1 litre of water into the roasting tray.  The steam this creates will help to give a crispy crust.  Bake for 30 - 35 minutes, turning the oven down to 200C/400F/GM 6 after 15 minutes.  The bread should be well risen, golden in colour and sound hollow when you tap the base.
  9. COOLING Turn out your loaf immediately, so that the base doesn't become soggy (Mr Hollywood and Ms Berry would not like!)  Allow to cool completely before eating.

And that's it!  I've discovered that bread making really isn't scary or complicated.  Yes it takes time, but most of that is waiting time.  It can be really therapeutic, and the results so much nicer than anything you'd get in the shops.

In another of Rachel's books (Everyday Kitchen) she suggests rising and proving bread in the fridge if you have time (you'll remember that a slow rise produces a better flavour) The rising takes 12-24 hours, and the proving up to 8 hours.  I'm thinking this could work well for me... I could make a batch of dough last thing at night, after the bairns are in bed.  Leave to rise until the following evening, then knock back; shape and prove.  The bread should be ready to bake the following morning.  I'll let you know what happens!